» Fishing Forum  Fishing Regulations  
 Members |  Forum Rules |  Search
Pages: 1 2   ( Go to first unread post ) Reply to this topicStart new topicStart Poll

> leak in my boat, ack!
AlconaKevin
Posted: Jul 16, 2015 - 07:29 pm


World Record Trout
*

Group: Members
Posts: 1546
Member No.: 1397
Joined: February 01, 2012


QUOTE (phoney @ Jul 16, 2015 - 08:47 am)
I had a similar problem and used a product called GLUVIT  and it did the job. It is expensive though. You paint it on .

I saw that stuff...where did you buy it?

EDIT:
Leisure Marine in Markham carries it.

I have a real small area to cover so doing prep work is not a problem.

EDIT 2: I am doing the work with the boat in the trailer and wonder how much success i am going to have using this upside down.

I know where the only leak is, and is an old hairline that is finally beginning to give away in a small area. I like the idea of pushing the marine putty in and hten just a simple layer over the keel area with the rest of the crack. It is so small you have to rub it across the grain to feel it. Is almost invisible.
I am sure it is not a flex stress crack just because of an old "incident" when being trailered up north a few years back....let us never speak of this incident again.


The price is a minor issue, worth it if it works...but for me, I am crawling under my boat and doing this up not looking to fight gravity.

PMEmail Poster
Top
AlconaKevin
Posted: Jul 21, 2015 - 07:48 pm


World Record Trout
*

Group: Members
Posts: 1546
Member No.: 1397
Joined: February 01, 2012


so the work has begun,

I decided on this, at only $9.99 from my local CTC.

Did a test repair on a metal outdoor rocking bench thingy first and it went very well.
It was easy to use, I mixed it well and it gave me plenty of time to place it where I wanted.

I sanded AND steel brushed all areas to a noticeable difference.
Gave it a real good work out with the wire brush as i wanted texture. I knew I had a bit of time for it to become thicker from my test.

It went on very well, I went back about an hour later and it was like a hard putty but I was able to tap down any sharp burrs. There was no drops or sagginf which was good.


Attached Image

PMEmail Poster
Top
AlconaKevin
Posted: Jul 21, 2015 - 07:52 pm


World Record Trout
*

Group: Members
Posts: 1546
Member No.: 1397
Joined: February 01, 2012


I know plan to sand it a bit, for smoothness as I have ordered a keel shield, the one that WILL go on an aluminum boat. (
http://www.gator-guards.com/keelshield-keel-guard/

Here is how it sits now, hard as rock man.

Oh yes and I also wiped the area with acetone first too.

From prep, which took less than 30 minutes and apply which took maybe 15-20.
I used one pack to do my boat and the bench.

The keel shield is really stop this from being exposed to direct water. I shopped around and found a pretty price at a place out in Vancouver. I lie to shop Canadian when I can.

Hopefully product arrives this week so I can apply this Saturday and test Monday.

Attached Image

PMEmail Poster
Top
Fishing Rod
Posted: Jul 22, 2015 - 12:48 pm


Trophy Trout
*

Group: Members
Posts: 823
Member No.: 4539
Joined: July 30, 2013


Looks like it is coming along great.

Will the keelshield cover the rivets and where the keel meets the hull?

PMEmail Poster
Top
AlconaKevin
Posted: Jul 22, 2015 - 08:50 pm


World Record Trout
*

Group: Members
Posts: 1546
Member No.: 1397
Joined: February 01, 2012


My plan is to cut the keel shield to fit within the rivets actually.

I also need to keep it off the roller on my trailer as well.

I was hoping for some leftover rto apply as side bumpers too.


PMEmail Poster
Top
Rob C
Posted: Jul 24, 2015 - 07:16 am


Smolt Trout
*

Group: Members
Posts: 157
Member No.: 243
Joined: February 16, 2011


Kevin,

Sand that down so that the surface is not jagged from being applied. Use a coarse sandpaper like a 60 grit and leave it like that, if you are applying a keel guard to it. The roughness of the sanded surface will allow the adhesive to bond a lot better than if you used a finer grit. Good luck take some pics when your done.

Rob C

PMEmail Poster
Top
AlconaKevin
Posted: Aug 06, 2015 - 09:30 am


World Record Trout
*

Group: Members
Posts: 1546
Member No.: 1397
Joined: February 01, 2012


The KeelSheild has arrived.

They were out of dark grey and only had white...yay.

i am going to install this weekend and cannot decide if I need it above the water line or not.
i was looking on the net and I see it done both ways.

I am aware of avoiding having it resting on anything when trailered and am seeing about half and half with regards to the water line.

The official website FAQ has this:

For boats the KeelShield must go far enough aft to cover any area that will be on the beach, plus one (1-2) foot extra. It is very important that the trailing edge of the KeelShield never touch the sand. Remember KeelShield protectors can never be to long. Please refer to the sizing chart. If this length is not long enough to reach past the present wear, add the additional length and order accordingly.

When i look at instructional vids and such they state to be like 6 inches ABOVE the water line.

PMEmail Poster
Top
Fishing Rod
Posted: Aug 06, 2015 - 12:24 pm


Trophy Trout
*

Group: Members
Posts: 823
Member No.: 4539
Joined: July 30, 2013


I would want it above the water line so there isn't any moving water pressure where your seam starts. So it doesn't peel like a banana over time.

PMEmail Poster
Top
AlconaKevin
Posted: Aug 06, 2015 - 12:42 pm


World Record Trout
*

Group: Members
Posts: 1546
Member No.: 1397
Joined: February 01, 2012


OK, I have been looking at some pics on the manufacturers website and I get it.

The water line is when traveling at high speed it seem.

You are right, i need to avoid water contact when moving fast (which is like 45kph for me) so it does not eat into the seal.

i plan to pick up some 3M 4200 anyways.

PMEmail Poster
Top
AlconaKevin
Posted: Aug 10, 2015 - 06:11 pm


World Record Trout
*

Group: Members
Posts: 1546
Member No.: 1397
Joined: February 01, 2012


DONE!

prepped it really well.

cleaned with acetone first

sanded it really well with a nice strong course paper (60?)

cleaned with isotopic alcohol

used the same paper and gave it strong "wipes" to create mini grooves. It was obvious in the shiny aluminum.

sanded the JB Weld until smoother.

Sat the keel shield in the sun on the driveway so it got hot and was easy to cut as I had to narrow it by a half.

cut it to the length.

cleaned again with alcohol

warmed the area with a hair dryer to be sure it was warm enough.

Was actually pretty easy to apply.

sealed the edges with 3M 4200 sealant.

I am happy.

Attached Image

PMEmail Poster
Top
bluenote
Posted: Aug 10, 2015 - 06:18 pm


World Record Trout
*

Group: Newbies
Posts: 2859
Member No.: 3844
Joined: March 04, 2013


Looks good. Be interested how works out over time . . .

Thanks

PMEmail Poster
Top
00deadon1
Posted: Aug 11, 2015 - 06:39 am


Trophy Trout
*

Group: Members
Posts: 516
Member No.: 5025
Joined: December 13, 2013


Interesting repair my son used JB Weld to seal leaks from chopping ice out of his boat before Christmas 6 years ago. JB is still there working sealing axe cuts in the bow.

PMEmail Poster
Top
Fishing Rod
Posted: Aug 11, 2015 - 08:50 am


Trophy Trout
*

Group: Members
Posts: 823
Member No.: 4539
Joined: July 30, 2013


Looks great Kevin.

Almost tempted to do it just for preventive medicine.

I just found 3 leaky rivets under my boat. Do you think the JB weld would be good enough for this?

PMEmail Poster
Top
AlconaKevin
Posted: Aug 11, 2015 - 09:42 am


World Record Trout
*

Group: Members
Posts: 1546
Member No.: 1397
Joined: February 01, 2012


QUOTE (Fishing Rod @ Aug 11, 2015 - 08:50 am)
Looks great Kevin.

Almost tempted to do it just for preventive medicine.

I just found 3 leaky rivets under my boat. Do you think the JB weld would be good enough for this?

I would think so.

i also fixed a metal rocking bench with it and it is used daily and is holding really well for a few weeks now.

As a bit of a "gauge" i put a bit on the side of my boat with minimal prep. No hole, just a spot.

The 3M 4200 is pretty nice stuff too, I may be tempted to use that instead.

PMEmail Poster
Top
Dutch
Posted: Aug 26, 2015 - 07:28 am


Lunker Trout
*

Group: Members
Posts: 331
Member No.: 7179
Joined: August 21, 2014


I used G/flex resin to fix my boat and I was very impressed. Not very expensive, easy to work with (I'm not very handy) and I've had no issues since. I have no qualms about recommending G/flex.

PMEmail Poster
Top

Topic Options Pages: 1 2  Reply to this topicStart new topicStart Poll


Berkley Power Bait Panfish Nibbles

Cordell Wally Diver Triple Threat

Piscifun Ultralight Spinning Reel

Magic Bait Crappie Bites

Mr Crappie Slab Daddy

Crappie Magnet White/Chart

Power Pro Braided Fishing Line

Custom 3D Fishing T-Shirts

Humminbird HELIX 5 CHIRP GPS G3
Fishing Lake Simcoe
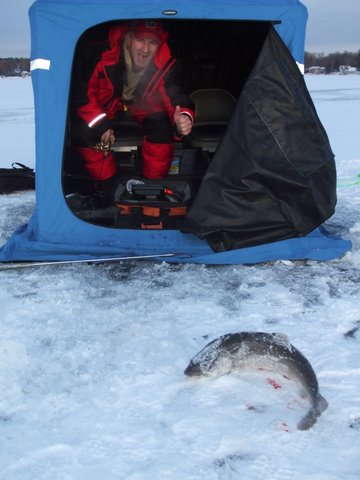
Fishing forum for Lake Simcoe & Area. Fishing Reports, Current Ice Conditions, Fishing Tips, Discussions & More. Featuring Ice Hut Rentals, Accommodations, Bait & Tackle shops, Marinas and Fishing Guides. The best fishing in Simcoe County!